Chapters (22)
- Chapter One
- Chapter Two
- Chapter Three
- Chapter Four
- Chapter Five
- Chapter Six
- Chapter Seven
- Chapter Eight
- Chapter Nine
- Chapter Ten
- Chapter Eleven
- Chapter Twelve
- Chapter Thirteen
- Chapter Fourteen
- Chapter Fifteen
- Chapter Sixteen
- Chapter Seventeen
- Epilogue
- Cinnamon Swirl Bread
- Stars and Stripes
- About the Author
- Turn the page for a sneak peek of
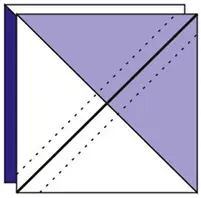
- Repeat for scrappy white segments
- Trim seam allowances to 1/4”
- Press diagonal seams open
- Attach the long red and white strips on a long edge to make a two-strip set that is approx. 400” long
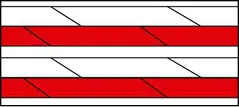
- Cut in half and sew the two halves together to make a four-strip set that is 9-1/2” wide x approx. 200” long
- Press the long seams toward the red fabric
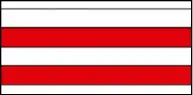
- Cut the four-strip set into segments and attach the labels that you created
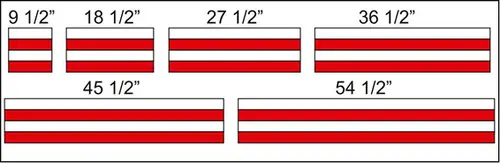
- Set the segments aside until time to assemble the quilt.
Blue + White Morning Star Blocks
This page is for the people who will work on the (21) Blue + White Morning Star Blocks.
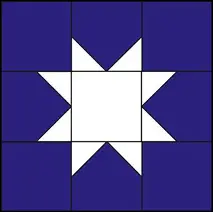
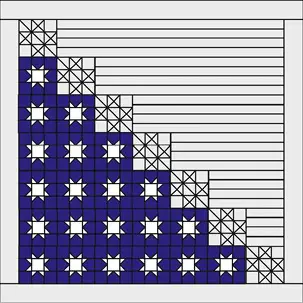
If you make “block kits,” each block will need:
- (1) 3-1/2” Star Center Square (White)
- (8) 2” Star Point Squares (White)
- (4) 3-1/2” Star Corner Squares (Blue)
- (4) 3-1/2” Star Background Squares
(Blue)
Make Star Point Units:
- Draw a diagonal line across the wrong side of each 2” white Star Point square
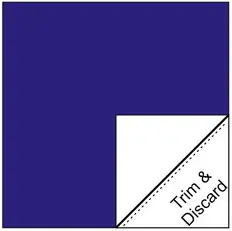
- Place 2” white Star Point square right sides together in a corner of a 3-1/2” blue Star Background square, as shown

- Sew just next to the drawn line in order to place the seam line just a bit closer to the corner (this allows for the “foldover” on the corner)
- Trim excess fabric and press seam allowance open
- Repeat at adjoining corner of 3-1/2” blue Star Background square
- Press and trim to 3-1/2”, if necessary
Assemble (21) Blue+White Star Blocks:
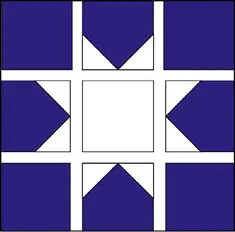
-
For each nine-patch block, you will need:
- (4) Blue Star Corner squares
- (1) White Star Center square
- (4) Star Point Units from previous step
- Attach square units as shown
- Set the blocks aside until time to assemble the quilt.
Split Star Blocks
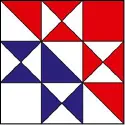
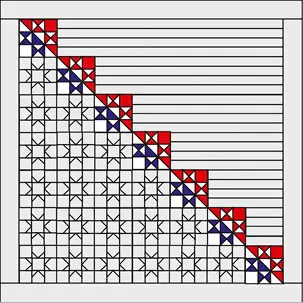
This page is for making the (7) Split Star Blocks.
You have already cut and labeled:
- White (7) 3-1/2” Corner Square (set aside)
- White (25) 5” HST & QST Squares
- Blue (11) 5” HST Center Square
- Red (7) 3-1/2” Corner Squares (set aside)
- Red (14) 5” HST & QST Squares
Please note:
- The squares for the Half-Square Triangles (HSTs) and the Quarter-Square Triangles (QSTs) were cut larger than needed and then will be trimmed to the correct size after the units are sewn
- Some HSTs will be trimmed to 3-1/2” square
- Some HSTs will be used to make QSTs and trimmed afterwards
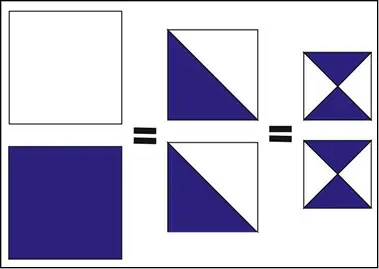
Make HST units from oversized 5” Squares
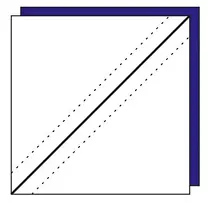
- Draw diagonal line on back of all (25) white 5” squares
- Place white squares right sides together with all red and blue 5” squares
- Sew 1/4” on each side of the drawn line
- Cut apart on the drawn line
- Press seam allowance toward darker fabric
-
You will now have (22) Blue+White HSTs and (28) Red+White HSTs
- TRIM ONLY (7) of the Blue+White HSTs to 3-1/2” and set aside for Centers
- TRIM ONLY (14) of the Red+White HSTs to 3-1/2” and set aside for Corners
Make QST units from the remaining (15) Blue+White HSTs and (14) Red+White HSTs: